- # Aimbot
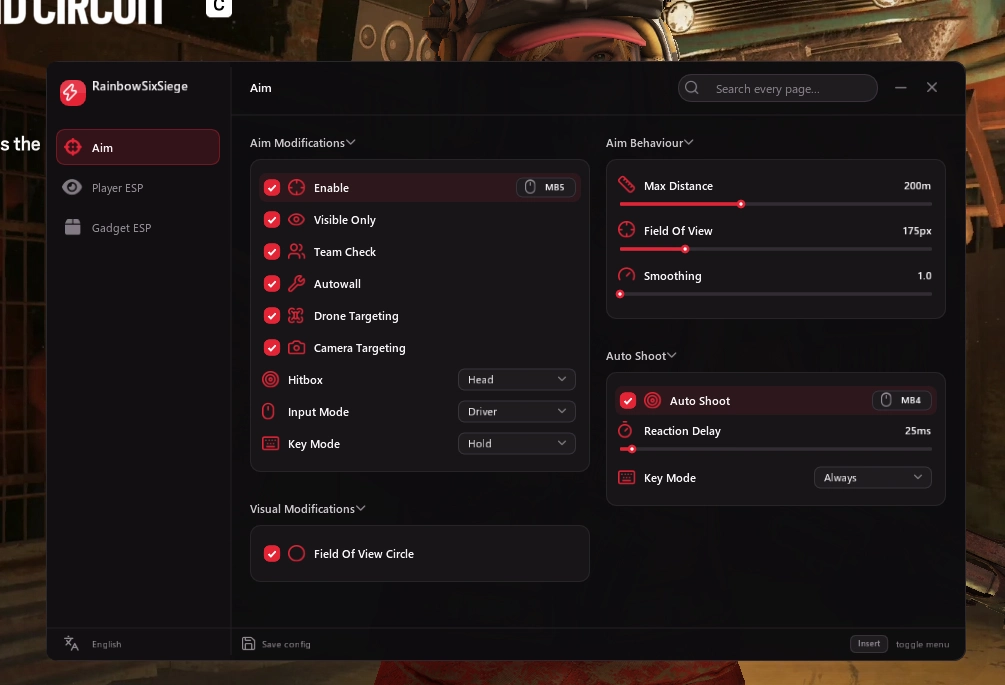
- **General Settings**
- - Enable / Disable Aimbot
- - Configurable Aim Key
- - Adjustable Field of View (FOV)
- - Adjustable Aim Smoothing
- - Maximum Target Distance
- - On-Screen FOV Circle
- **Target Selection**
- - Head, Neck & Chest Targeting
- - Closest Bone Targeting
- - Team Filtering
- - Visibility-Only Targeting
- - Autowall Targeting
- - Drone Targeting
- - Camera Targeting
- **Auto-Shoot / Trigger**
- - Enable / Disable Auto-Shoot
- - Configurable Auto-Shoot Key
- - Adjustable Auto-Shoot Delay
- **Input Methods**
- - Driver-Based Mouse Input
- - Standard Mouse Input
- ---
- # Player ESP
- **Player Information**
- - Player Names
- - Room Names
- - Distance Indicators
- - Health Bars & Numeric Health Values
- **Visual Elements**
- - Bounding Boxes
- - Skeleton ESP
- - Capsule / Hitbox Markers
- - Head Circles
- **Visibility & Filtering**
- - Enable / Disable Player ESP
- - Local Player Visibility Toggle
- - Team Visibility Toggle
- - Maximum Rendering Distance
- - Visibility-Aware Rendering
- - Separate Opacity for Invisible & Shootable Players
- **Customisation**
- - Customisable Team & Enemy Colours
- - Visibility-Based Opacity Settings
- ---
- # Gadget ESP
- **Gadget Detection**
- - Drones & Surveillance Cameras
- - Traps & Deployable Shields
- - Explosives & Breaching Devices
- - Active Defence Systems (ADS)
- - Jäger Equipment
- - Black Eye Cameras
- - Evil Eye Cameras
- - Yokai Drones
- - Mute Jammers
- - Goyo Canisters
- - Kiba Barriers
- - Bombs & Barbed Wire
- - Additional Attacker & Defender Gadgets
- **Gadget Information & Visuals**
- - Gadget Identification & Labels
- - World-Space Gadget Bounding Boxes
- - Attacker / Defender Classification
- **Visibility & Filtering**
- - Team-Based Gadget Filtering
- - Gadget Visibility Checks
- - Shootable-Through-Cover Detection
- ---
- # Radar
- **Web Radar**
- - Web-Based Radar
Unbanned: R6S External Cheat
In Stock
In Stock
Out of Stock